2020. 6. 7. 06:30ㆍOracle Cloud
Contents
* 해당 내용은 오라클 제품을 다루고 있지만 이는 개인적인 테스트 결과이며, 오라클 공식 문서는 아님을 미리 밝힙니다.
이제 HTTPS 적용을 위하여 SSL인증서를 받아보겠습니다.
* 여기서는 SSL 인증서 중 무료로 발급을 해주는 Let's Encrypt 인증서를 적용합니다.
우선 발급을 받는데 아래와 같이 진행하겠습니다.
A. Let's Encrypt SSL 인증서 준비하기
B. Let's Encrypt SSL 인증서 발급받기
C. SSL 인증서 NGINX에 적용하기
위 3 분류로 진행을 하겠습니다.
우선 Let's Encrypt SSL 인증서를 발급받기 전 환경을 구성해 보겠습니다.
12-1-1. Let's Encrypt SSL의 자동 인증서 관리 환경을 구성합니다.
Let's Encrypt SSL 발급을 위한 /.well-known/acme-challenge 를 구성하는데 여기서는 /var/www/ 아래 letsencrypt 라는 폴더를 만들어 그 아래 만들겠습니다/
명령창에 mkdir -p /var/www/letsencrypt/.well-known/acme-challenge 를 입력합니다.
ubuntu@wordpress:~$ mkdir -p /var/www/letsencrypt/.well-known/acme-challenge12-1-2. Nginx에 acme-challenge 폴더위치를 알리기 위하여 letsencrypt.conf 파일 만들기
Nginx 라우팅 설정파일은 /etc/snippets/ 폴더에서 관리하는데 그 아래 letsencrypt.conf 파일을 만들고 우리가 로그인한 계정인 ubuntu가 해당 폴더 권한이 없으므로 해당 권한 및 파일수정권한을 가져오도록 하겠습니다.
명령창에 sudo touch /etc/nginx/snippets/letsencrypt.conf 를 입력합니다.
그런 후에 sudo chown root:ubuntu /etc/nginx/snippets/letsencrypt.conf 를 입력하고
그 다음 sudo chmod 775 /etc/nginx/snippets/letsencrypt.conf 를 입력합니다.
ubuntu@wordpress:~$ sudo touch /etc/nginx/snippets/letsencrypt.conf
ubuntu@wordpress:~$ sudo chown root:ubuntu /etc/nginx/snippets/letsencrypt.conf
ubuntu@wordpress:~$ sudo chmod 775 /etc/nginx/snippets/letsencrypt.conf
그럼 Editplus로 접속하여 수정을 하시거나 nano 에디터를 사용하여 수정합니다.
여기서는 nano 에디터로 설명하겠습니다.
명령창에 sudo nano /etc/nginx/snippets/letsencrypt.conf 를 입력합니다.
ubuntu@wordpress:~$ sudo nano /etc/nginx/snippets/letsencrypt.conf화면이 나오면 아래 내용을 붙여줍니다. (드래그하여 CTRL + C 한후 PuTTY 화면에서 마우스 오른쪽)
location ^~ /.well-known/acme-challenge/ {
    default_type "text/plain";
    root /var/www/letsencrypt;
}
그 다음 CTRL + X 한 후 Y를 누르고 파일명이 나오면 Enter키를 눌러줍니다.
location ^~ /.well-known/acme-challenge/ {
default_type "text/plain";
root /var/www/letsencrypt;
}12-1-3. Nginx 라우팅 설정에 letsencrypt.conf의 내용을 붙여줍니다.
Editplus창에서 /etc/nginx/sites-available/default 를 불러옵니다.
그 다음 server_name 도메인명; 아래 include /etc/nginx/snippets/letsencrypt.conf; 를 붙여줍니다.
그럼 아래처럼 될 것입니다.
# Default server configuration
server {
	listen 80 default_server;
	listen [::]:80 default_server;

	root /var/www/html;
	index index.php index.html index.htm index.nginx-debian.html;

	server_name itreport.tk;

    include /etc/nginx/snippets/letsencrypt.conf;   ### .well-know/acme-challenge 알림

	location / {
		try_files $uri $uri/ =404;
       if (!-e $request_filename) {
         rewrite ^.*$ /index.php last;
		}
	}

	location ~ \.php$ {
		include snippets/fastcgi-php.conf;
		fastcgi_pass unix:/run/php/php7.4-fpm.sock;
		fastcgi_param SCRIPT_FILENAME $document_root$fastcgi_script_name;
		include fastcgi_params;
		fastcgi_read_timeout 300;
	}

	location ~ /\.ht {
	    deny all;
	}
}

### HTTP (CNAME 연결 www.itreport.tk to itreport.tk ) ###
 server {
    listen 80;
    listen [::]:80;
    server_name www.itreport.tk;

	include /etc/nginx/snippets/letsencrypt.conf;   # .well-know/acme-challenge 알림

    location / {
        return 301 http://itreport.tk$request_uri;     ### http://itreport.tk 로 리다이렉팅
    }
}
12-1-4. 위 내용을 적용해 주기 위하여 nginx를 재가동 합니다.
명령창에 sudo nginx -t 와 sudo service nginx restart 를 입력합니다.
ubuntu@wordpress:~$ sudo nginx -t
nginx: the configuration file /etc/nginx/nginx.conf syntax is ok
nginx: configuration file /etc/nginx/nginx.conf test is successful
ubuntu@wordpress:~$ sudo service nginx restart
이로써 Let's Encrypt SSL 발급을 위한 환경이 모두 갖추어졌습니다.
이제 Let's Encrypt SSL를 발급받아 보겠습니다.
12-2-1. Let's Encrypt SSL 인증서를 다운로드 받아 보겠습니다.
명령창에 wget https://dl.eff.org/certbot-auto -P /home/ubuntu/ 를 입력합니다.
ubuntu@wordpress:~$ wget https://dl.eff.org/certbot-auto -P /home/ubuntu/
--2020-06-02 16:20:06--  https://dl.eff.org/certbot-auto
Resolving dl.eff.org (dl.eff.org)... 151.101.228.201, 2a04:4e42:15::201
Connecting to dl.eff.org (dl.eff.org)|151.101.228.201|:443... connected.
HTTP request sent, awaiting response... 200 OK
Length: 79712 (78K) [application/octet-stream]
Saving to: ‘/home/ubuntu/certbot-auto’

certbot-auto                            100%[============================================================================>]  77.84K  --.-KB/s    in 0.08s

2020-06-02 16:20:07 (983 KB/s) - ‘/home/ubuntu/certbot-auto’ saved [79712/79712]
12-2-2. certbot-auto의 권한을 변경한 후 실행합니다.
명령창에 chmod a+x certbot-auto 와 export LC_ALL="C" 를 입력합니다.
ubuntu@wordpress:~$ chmod a+x certbot-auto
ubuntu@wordpress:~$ export LC_ALL="C"
12-2-3. 이제 certbot을 이용하여 HTTPS SSL 인증서를 발급받습니다.
명령창에 ubuntu@wordpress:~$ /home/ubuntu/certbot-auto certonly --webroot --agree-tos --no-eff-email --email 본인메일주소 -w /var/www/letsencrypt -d 본인도메인 -d 본인도메인(www주소) 를 입력합니다.
그리고 이어서 설치하겠냐는 질문이 나오면 Y를 누릅니다.
After this operation, 194 MB of additional disk space will be used.
Do you want to continue? [Y/n] y
ubuntu@wordpress:~$ /home/ubuntu/certbot-auto certonly --webroot --agree-tos --no-eff-email --email itreport@itreport.tk -w /var/www/letsencrypt -d itreport.tk -d www.itreport.tk
Requesting to rerun /home/ubuntu/certbot-auto with root privileges...
Bootstrapping dependencies for Debian-based OSes... (you can skip this with --no-bootstrap)
Hit:1 http://ap-seoul-1-ad-1.clouds.archive.ubuntu.com/ubuntu bionic InRelease
Get:2 http://security.ubuntu.com/ubuntu bionic-security InRelease [88.7 kB]
Hit:3 http://ppa.launchpad.net/ondrej/php/ubuntu bionic InRelease
Get:4 http://ap-seoul-1-ad-1.clouds.archive.ubuntu.com/ubuntu bionic-updates InRelease [88.7 kB]
Get:5 http://ap-seoul-1-ad-1.clouds.archive.ubuntu.com/ubuntu bionic-backports InRelease [74.6 kB]
Fetched 252 kB in 2s (125 kB/s)
Reading package lists... Done
Reading package lists... Done
Building dependency tree
Reading state information... Done
ca-certificates is already the newest version (20190110~18.04.1).
ca-certificates set to manually installed.
The following package was automatically installed and is no longer required:
  grub-pc-bin
Use 'sudo apt autoremove' to remove it.
The following additional packages will be installed:
  *******
Suggested packages:
  *******
Recommended packages:
  manpages-dev
The following NEW packages will be installed:
  *******
The following packages will be upgraded:
  libssl1.1 openssl
2 upgraded, 50 newly installed, 0 to remove and 5 not upgraded.
Need to get 69.0 MB of archives.
After this operation, 194 MB of additional disk space will be used.
Do you want to continue? [Y/n] y
Get:1 http://ppa.launchpad.net/ondrej/php/ubuntu bionic/main amd64 libssl1.1 amd64 1.1.1g-1+ubuntu18.04.1+deb.sury.org+1 [1529 kB]
Get:2 http://ap-seoul-1-ad-1.clouds.archive.ubuntu.com/ubuntu bionic-updates/main amd64 libpython2.7-minimal amd64 2.7.17-1~18.04ubuntu1 [335 kB]
Get:3 http://ap-seoul-1-ad-1.clouds.archive.ubuntu.com/ubuntu bionic-updates/main amd64 python2.7-minimal amd64 2.7.17-1~18.04ubuntu1 [1294 kB]
Get:4 http://ppa.launchpad.net/ondrej/php/ubuntu bionic/main amd64 libssl-dev amd64 1.1.1g-1+ubuntu18.04.1+deb.sury.org+1 [1797 kB]
Get:5 http://ap-seoul-1-ad-1.clouds.archive.ubuntu.com/ubuntu bionic/main amd64 python-minimal amd64 2.7.15~rc1-1 [28.1 kB]
Get:6 http://ap-seoul-1-ad-1.clouds.archive.ubuntu.com/ubuntu bionic-updates/main amd64 libpython2.7-stdlib amd64 2.7.17-1~18.04ubuntu1 [1915 kB]
Get:7 http://ppa.launchpad.net/ondrej/php/ubuntu bionic/main amd64 openssl amd64 1.1.1g-1+ubuntu18.04.1+deb.sury.org+1 [832 kB]
Get:8 http://ap-seoul-1-ad-1.clouds.archive.ubuntu.com/ubuntu bionic-updates/main amd64 python2.7 amd64 2.7.17-1~18.04ubuntu1 [248 kB]
Get:9 http://ap-seoul-1-ad-1.clouds.archive.ubuntu.com/ubuntu bionic/main amd64 libpython-stdlib amd64 2.7.15~rc1-1 [7620 B]
Get:10 http://ap-seoul-1-ad-1.clouds.archive.ubuntu.com/ubuntu bionic/main amd64 python amd64 2.7.15~rc1-1 [140 kB]
Get:11 http://ap-seoul-1-ad-1.clouds.archive.ubuntu.com/ubuntu bionic/main amd64 augeas-lenses all 1.10.1-2 [300 kB]
Get:12 http://ap-seoul-1-ad-1.clouds.archive.ubuntu.com/ubuntu bionic-updates/main amd64 binutils-common amd64 2.30-21ubuntu1~18.04.3 [196 kB]
Get:13 http://ap-seoul-1-ad-1.clouds.archive.ubuntu.com/ubuntu bionic-updates/main amd64 libbinutils amd64 2.30-21ubuntu1~18.04.3 [488 kB]
Get:14 http://ap-seoul-1-ad-1.clouds.archive.ubuntu.com/ubuntu bionic-updates/main amd64 binutils-x86-64-linux-gnu amd64 2.30-21ubuntu1~18.04.3 [1839 kB]
Get:15 http://ap-seoul-1-ad-1.clouds.archive.ubuntu.com/ubuntu bionic-updates/main amd64 binutils amd64 2.30-21ubuntu1~18.04.3 [3388 B]
Get:16 http://ap-seoul-1-ad-1.clouds.archive.ubuntu.com/ubuntu bionic-updates/main amd64 gcc-7-base amd64 7.5.0-3ubuntu1~18.04 [18.3 kB]
Get:17 http://ap-seoul-1-ad-1.clouds.archive.ubuntu.com/ubuntu bionic/main amd64 libisl19 amd64 0.19-1 [551 kB]
Get:18 http://ap-seoul-1-ad-1.clouds.archive.ubuntu.com/ubuntu bionic/main amd64 libmpc3 amd64 1.1.0-1 [40.8 kB]
Get:19 http://ap-seoul-1-ad-1.clouds.archive.ubuntu.com/ubuntu bionic-updates/main amd64 cpp-7 amd64 7.5.0-3ubuntu1~18.04 [8591 kB]
Get:20 http://ap-seoul-1-ad-1.clouds.archive.ubuntu.com/ubuntu bionic-updates/main amd64 cpp amd64 4:7.4.0-1ubuntu2.3 [27.7 kB]
Get:21 http://ap-seoul-1-ad-1.clouds.archive.ubuntu.com/ubuntu bionic-updates/main amd64 libcc1-0 amd64 8.4.0-1ubuntu1~18.04 [39.4 kB]
Get:22 http://ap-seoul-1-ad-1.clouds.archive.ubuntu.com/ubuntu bionic-updates/main amd64 libgomp1 amd64 8.4.0-1ubuntu1~18.04 [76.5 kB]
Get:23 http://ap-seoul-1-ad-1.clouds.archive.ubuntu.com/ubuntu bionic-updates/main amd64 libitm1 amd64 8.4.0-1ubuntu1~18.04 [27.9 kB]
Get:24 http://ap-seoul-1-ad-1.clouds.archive.ubuntu.com/ubuntu bionic-updates/main amd64 libatomic1 amd64 8.4.0-1ubuntu1~18.04 [9192 B]
Get:25 http://ap-seoul-1-ad-1.clouds.archive.ubuntu.com/ubuntu bionic-updates/main amd64 libasan4 amd64 7.5.0-3ubuntu1~18.04 [358 kB]
Get:26 http://ap-seoul-1-ad-1.clouds.archive.ubuntu.com/ubuntu bionic-updates/main amd64 liblsan0 amd64 8.4.0-1ubuntu1~18.04 [133 kB]
Get:27 http://ap-seoul-1-ad-1.clouds.archive.ubuntu.com/ubuntu bionic-updates/main amd64 libtsan0 amd64 8.4.0-1ubuntu1~18.04 [288 kB]
Get:28 http://ap-seoul-1-ad-1.clouds.archive.ubuntu.com/ubuntu bionic-updates/main amd64 libubsan0 amd64 7.5.0-3ubuntu1~18.04 [126 kB]
Get:29 http://ap-seoul-1-ad-1.clouds.archive.ubuntu.com/ubuntu bionic-updates/main amd64 libcilkrts5 amd64 7.5.0-3ubuntu1~18.04 [42.5 kB]
Get:30 http://ap-seoul-1-ad-1.clouds.archive.ubuntu.com/ubuntu bionic-updates/main amd64 libmpx2 amd64 8.4.0-1ubuntu1~18.04 [11.6 kB]
Get:31 http://ap-seoul-1-ad-1.clouds.archive.ubuntu.com/ubuntu bionic-updates/main amd64 libquadmath0 amd64 8.4.0-1ubuntu1~18.04 [134 kB]
Get:32 http://ap-seoul-1-ad-1.clouds.archive.ubuntu.com/ubuntu bionic-updates/main amd64 libgcc-7-dev amd64 7.5.0-3ubuntu1~18.04 [2378 kB]
Get:33 http://ap-seoul-1-ad-1.clouds.archive.ubuntu.com/ubuntu bionic-updates/main amd64 gcc-7 amd64 7.5.0-3ubuntu1~18.04 [9381 kB]
Get:34 http://ap-seoul-1-ad-1.clouds.archive.ubuntu.com/ubuntu bionic-updates/main amd64 gcc amd64 4:7.4.0-1ubuntu2.3 [5184 B]
Get:35 http://ap-seoul-1-ad-1.clouds.archive.ubuntu.com/ubuntu bionic/main amd64 libaugeas0 amd64 1.10.1-2 [159 kB]
Get:36 http://ap-seoul-1-ad-1.clouds.archive.ubuntu.com/ubuntu bionic/main amd64 libc-dev-bin amd64 2.27-3ubuntu1 [71.8 kB]
Get:37 http://ap-seoul-1-ad-1.clouds.archive.ubuntu.com/ubuntu bionic-updates/main amd64 linux-libc-dev amd64 4.15.0-101.102 [994 kB]
Get:38 http://ap-seoul-1-ad-1.clouds.archive.ubuntu.com/ubuntu bionic/main amd64 libc6-dev amd64 2.27-3ubuntu1 [2587 kB]
Get:39 http://ap-seoul-1-ad-1.clouds.archive.ubuntu.com/ubuntu bionic-updates/main amd64 libexpat1-dev amd64 2.2.5-3ubuntu0.2 [122 kB]
Get:40 http://ap-seoul-1-ad-1.clouds.archive.ubuntu.com/ubuntu bionic-updates/main amd64 libpython2.7 amd64 2.7.17-1~18.04ubuntu1 [1053 kB]
Get:41 http://ap-seoul-1-ad-1.clouds.archive.ubuntu.com/ubuntu bionic-updates/main amd64 libpython2.7-dev amd64 2.7.17-1~18.04ubuntu1 [28.3 MB]
Get:42 http://ap-seoul-1-ad-1.clouds.archive.ubuntu.com/ubuntu bionic/main amd64 libpython-dev amd64 2.7.15~rc1-1 [7684 B]
Get:43 http://ap-seoul-1-ad-1.clouds.archive.ubuntu.com/ubuntu bionic-updates/main amd64 python2.7-dev amd64 2.7.17-1~18.04ubuntu1 [279 kB]
Get:44 http://ap-seoul-1-ad-1.clouds.archive.ubuntu.com/ubuntu bionic/main amd64 python-dev amd64 2.7.15~rc1-1 [1256 B]
Get:45 http://ap-seoul-1-ad-1.clouds.archive.ubuntu.com/ubuntu bionic-updates/universe amd64 python-pip-whl all 9.0.1-2.3~ubuntu1.18.04.1 [1653 kB]
Get:46 http://ap-seoul-1-ad-1.clouds.archive.ubuntu.com/ubuntu bionic/main amd64 python-pkg-resources all 39.0.1-2 [128 kB]
Get:47 http://ap-seoul-1-ad-1.clouds.archive.ubuntu.com/ubuntu bionic/universe amd64 python-virtualenv all 15.1.0+ds-1.1 [46.8 kB]
Get:48 http://ap-seoul-1-ad-1.clouds.archive.ubuntu.com/ubuntu bionic-updates/main amd64 python3-lib2to3 all 3.6.9-1~18.04 [77.4 kB]
Get:49 http://ap-seoul-1-ad-1.clouds.archive.ubuntu.com/ubuntu bionic-updates/main amd64 python3-distutils all 3.6.9-1~18.04 [144 kB]
Get:50 http://ap-seoul-1-ad-1.clouds.archive.ubuntu.com/ubuntu bionic/universe amd64 python3-virtualenv all 15.1.0+ds-1.1 [43.4 kB]
Get:51 http://ap-seoul-1-ad-1.clouds.archive.ubuntu.com/ubuntu bionic/universe amd64 virtualenv all 15.1.0+ds-1.1 [4476 B]
Get:52 http://ap-seoul-1-ad-1.clouds.archive.ubuntu.com/ubuntu bionic/main amd64 libffi-dev amd64 3.2.1-8 [156 kB]
Fetched 69.0 MB in 41s (1667 kB/s)
Extracting templates from packages: 100%
Preconfiguring packages ...
Selecting previously unselected package libpython2.7-minimal:amd64.
(Reading database ... 102729 files and directories currently installed.)
Preparing to unpack .../0-libpython2.7-minimal_2.7.17-1~18.04ubuntu1_amd64.deb ...
Unpacking libpython2.7-minimal:amd64 (2.7.17-1~18.04ubuntu1) ...
Selecting previously unselected package python2.7-minimal.
Preparing to unpack .../1-python2.7-minimal_2.7.17-1~18.04ubuntu1_amd64.deb ...
Unpacking python2.7-minimal (2.7.17-1~18.04ubuntu1) ...
Selecting previously unselected package python-minimal.
Preparing to unpack .../2-python-minimal_2.7.15~rc1-1_amd64.deb ...
Unpacking python-minimal (2.7.15~rc1-1) ...
Preparing to unpack .../3-libssl1.1_1.1.1g-1+ubuntu18.04.1+deb.sury.org+1_amd64.deb ...
Unpacking libssl1.1:amd64 (1.1.1g-1+ubuntu18.04.1+deb.sury.org+1) over (1.1.1-1ubuntu2.1~18.04.6) ...
Selecting previously unselected package libpython2.7-stdlib:amd64.
Preparing to unpack .../4-libpython2.7-stdlib_2.7.17-1~18.04ubuntu1_amd64.deb ...
Unpacking libpython2.7-stdlib:amd64 (2.7.17-1~18.04ubuntu1) ...
Selecting previously unselected package python2.7.
Preparing to unpack .../5-python2.7_2.7.17-1~18.04ubuntu1_amd64.deb ...
Unpacking python2.7 (2.7.17-1~18.04ubuntu1) ...
Selecting previously unselected package libpython-stdlib:amd64.
Preparing to unpack .../6-libpython-stdlib_2.7.15~rc1-1_amd64.deb ...
Unpacking libpython-stdlib:amd64 (2.7.15~rc1-1) ...
Setting up libpython2.7-minimal:amd64 (2.7.17-1~18.04ubuntu1) ...
Setting up python2.7-minimal (2.7.17-1~18.04ubuntu1) ...
Linking and byte-compiling packages for runtime python2.7...
Setting up python-minimal (2.7.15~rc1-1) ...
Selecting previously unselected package python.
(Reading database ... 103477 files and directories currently installed.)
Preparing to unpack .../00-python_2.7.15~rc1-1_amd64.deb ...
Unpacking python (2.7.15~rc1-1) ...
Selecting previously unselected package augeas-lenses.
Preparing to unpack .../01-augeas-lenses_1.10.1-2_all.deb ...
Unpacking augeas-lenses (1.10.1-2) ...
Selecting previously unselected package binutils-common:amd64.
Preparing to unpack .../02-binutils-common_2.30-21ubuntu1~18.04.3_amd64.deb ...
Unpacking binutils-common:amd64 (2.30-21ubuntu1~18.04.3) ...
Selecting previously unselected package libbinutils:amd64.
Preparing to unpack .../03-libbinutils_2.30-21ubuntu1~18.04.3_amd64.deb ...
Unpacking libbinutils:amd64 (2.30-21ubuntu1~18.04.3) ...
Selecting previously unselected package binutils-x86-64-linux-gnu.
Preparing to unpack .../04-binutils-x86-64-linux-gnu_2.30-21ubuntu1~18.04.3_amd64.deb ...
Unpacking binutils-x86-64-linux-gnu (2.30-21ubuntu1~18.04.3) ...
Selecting previously unselected package binutils.
Preparing to unpack .../05-binutils_2.30-21ubuntu1~18.04.3_amd64.deb ...
Unpacking binutils (2.30-21ubuntu1~18.04.3) ...
Selecting previously unselected package gcc-7-base:amd64.
Preparing to unpack .../06-gcc-7-base_7.5.0-3ubuntu1~18.04_amd64.deb ...
Unpacking gcc-7-base:amd64 (7.5.0-3ubuntu1~18.04) ...
Selecting previously unselected package libisl19:amd64.
Preparing to unpack .../07-libisl19_0.19-1_amd64.deb ...
Unpacking libisl19:amd64 (0.19-1) ...
Selecting previously unselected package libmpc3:amd64.
Preparing to unpack .../08-libmpc3_1.1.0-1_amd64.deb ...
Unpacking libmpc3:amd64 (1.1.0-1) ...
Selecting previously unselected package cpp-7.
Preparing to unpack .../09-cpp-7_7.5.0-3ubuntu1~18.04_amd64.deb ...
Unpacking cpp-7 (7.5.0-3ubuntu1~18.04) ...
Selecting previously unselected package cpp.
Preparing to unpack .../10-cpp_4%3a7.4.0-1ubuntu2.3_amd64.deb ...
Unpacking cpp (4:7.4.0-1ubuntu2.3) ...
Selecting previously unselected package libcc1-0:amd64.
Preparing to unpack .../11-libcc1-0_8.4.0-1ubuntu1~18.04_amd64.deb ...
Unpacking libcc1-0:amd64 (8.4.0-1ubuntu1~18.04) ...
Selecting previously unselected package libgomp1:amd64.
Preparing to unpack .../12-libgomp1_8.4.0-1ubuntu1~18.04_amd64.deb ...
Unpacking libgomp1:amd64 (8.4.0-1ubuntu1~18.04) ...
Selecting previously unselected package libitm1:amd64.
Preparing to unpack .../13-libitm1_8.4.0-1ubuntu1~18.04_amd64.deb ...
Unpacking libitm1:amd64 (8.4.0-1ubuntu1~18.04) ...
Selecting previously unselected package libatomic1:amd64.
Preparing to unpack .../14-libatomic1_8.4.0-1ubuntu1~18.04_amd64.deb ...
Unpacking libatomic1:amd64 (8.4.0-1ubuntu1~18.04) ...
Selecting previously unselected package libasan4:amd64.
Preparing to unpack .../15-libasan4_7.5.0-3ubuntu1~18.04_amd64.deb ...
Unpacking libasan4:amd64 (7.5.0-3ubuntu1~18.04) ...
Selecting previously unselected package liblsan0:amd64.
Preparing to unpack .../16-liblsan0_8.4.0-1ubuntu1~18.04_amd64.deb ...
Unpacking liblsan0:amd64 (8.4.0-1ubuntu1~18.04) ...
Selecting previously unselected package libtsan0:amd64.
Preparing to unpack .../17-libtsan0_8.4.0-1ubuntu1~18.04_amd64.deb ...
Unpacking libtsan0:amd64 (8.4.0-1ubuntu1~18.04) ...
Selecting previously unselected package libubsan0:amd64.
Preparing to unpack .../18-libubsan0_7.5.0-3ubuntu1~18.04_amd64.deb ...
Unpacking libubsan0:amd64 (7.5.0-3ubuntu1~18.04) ...
Selecting previously unselected package libcilkrts5:amd64.
Preparing to unpack .../19-libcilkrts5_7.5.0-3ubuntu1~18.04_amd64.deb ...
Unpacking libcilkrts5:amd64 (7.5.0-3ubuntu1~18.04) ...
Selecting previously unselected package libmpx2:amd64.
Preparing to unpack .../20-libmpx2_8.4.0-1ubuntu1~18.04_amd64.deb ...
Unpacking libmpx2:amd64 (8.4.0-1ubuntu1~18.04) ...
Selecting previously unselected package libquadmath0:amd64.
Preparing to unpack .../21-libquadmath0_8.4.0-1ubuntu1~18.04_amd64.deb ...
Unpacking libquadmath0:amd64 (8.4.0-1ubuntu1~18.04) ...
Selecting previously unselected package libgcc-7-dev:amd64.
Preparing to unpack .../22-libgcc-7-dev_7.5.0-3ubuntu1~18.04_amd64.deb ...
Unpacking libgcc-7-dev:amd64 (7.5.0-3ubuntu1~18.04) ...
Selecting previously unselected package gcc-7.
Preparing to unpack .../23-gcc-7_7.5.0-3ubuntu1~18.04_amd64.deb ...
Unpacking gcc-7 (7.5.0-3ubuntu1~18.04) ...
Selecting previously unselected package gcc.
Preparing to unpack .../24-gcc_4%3a7.4.0-1ubuntu2.3_amd64.deb ...
Unpacking gcc (4:7.4.0-1ubuntu2.3) ...
Selecting previously unselected package libaugeas0:amd64.
Preparing to unpack .../25-libaugeas0_1.10.1-2_amd64.deb ...
Unpacking libaugeas0:amd64 (1.10.1-2) ...
Selecting previously unselected package libc-dev-bin.
Preparing to unpack .../26-libc-dev-bin_2.27-3ubuntu1_amd64.deb ...
Unpacking libc-dev-bin (2.27-3ubuntu1) ...
Selecting previously unselected package linux-libc-dev:amd64.
Preparing to unpack .../27-linux-libc-dev_4.15.0-101.102_amd64.deb ...
Unpacking linux-libc-dev:amd64 (4.15.0-101.102) ...
Selecting previously unselected package libc6-dev:amd64.
Preparing to unpack .../28-libc6-dev_2.27-3ubuntu1_amd64.deb ...
Unpacking libc6-dev:amd64 (2.27-3ubuntu1) ...
Selecting previously unselected package libexpat1-dev:amd64.
Preparing to unpack .../29-libexpat1-dev_2.2.5-3ubuntu0.2_amd64.deb ...
Unpacking libexpat1-dev:amd64 (2.2.5-3ubuntu0.2) ...
Selecting previously unselected package libpython2.7:amd64.
Preparing to unpack .../30-libpython2.7_2.7.17-1~18.04ubuntu1_amd64.deb ...
Unpacking libpython2.7:amd64 (2.7.17-1~18.04ubuntu1) ...
Selecting previously unselected package libpython2.7-dev:amd64.
Preparing to unpack .../31-libpython2.7-dev_2.7.17-1~18.04ubuntu1_amd64.deb ...
Unpacking libpython2.7-dev:amd64 (2.7.17-1~18.04ubuntu1) ...
Selecting previously unselected package libpython-dev:amd64.
Preparing to unpack .../32-libpython-dev_2.7.15~rc1-1_amd64.deb ...
Unpacking libpython-dev:amd64 (2.7.15~rc1-1) ...
Selecting previously unselected package libssl-dev:amd64.
Preparing to unpack .../33-libssl-dev_1.1.1g-1+ubuntu18.04.1+deb.sury.org+1_amd64.deb ...
Unpacking libssl-dev:amd64 (1.1.1g-1+ubuntu18.04.1+deb.sury.org+1) ...
Preparing to unpack .../34-openssl_1.1.1g-1+ubuntu18.04.1+deb.sury.org+1_amd64.deb ...
Unpacking openssl (1.1.1g-1+ubuntu18.04.1+deb.sury.org+1) over (1.1.1-1ubuntu2.1~18.04.6) ...
Selecting previously unselected package python2.7-dev.
Preparing to unpack .../35-python2.7-dev_2.7.17-1~18.04ubuntu1_amd64.deb ...
Unpacking python2.7-dev (2.7.17-1~18.04ubuntu1) ...
Selecting previously unselected package python-dev.
Preparing to unpack .../36-python-dev_2.7.15~rc1-1_amd64.deb ...
Unpacking python-dev (2.7.15~rc1-1) ...
Selecting previously unselected package python-pip-whl.
Preparing to unpack .../37-python-pip-whl_9.0.1-2.3~ubuntu1.18.04.1_all.deb ...
Unpacking python-pip-whl (9.0.1-2.3~ubuntu1.18.04.1) ...
Selecting previously unselected package python-pkg-resources.
Preparing to unpack .../38-python-pkg-resources_39.0.1-2_all.deb ...
Unpacking python-pkg-resources (39.0.1-2) ...
Selecting previously unselected package python-virtualenv.
Preparing to unpack .../39-python-virtualenv_15.1.0+ds-1.1_all.deb ...
Unpacking python-virtualenv (15.1.0+ds-1.1) ...
Selecting previously unselected package python3-lib2to3.
Preparing to unpack .../40-python3-lib2to3_3.6.9-1~18.04_all.deb ...
Unpacking python3-lib2to3 (3.6.9-1~18.04) ...
Selecting previously unselected package python3-distutils.
Preparing to unpack .../41-python3-distutils_3.6.9-1~18.04_all.deb ...
Unpacking python3-distutils (3.6.9-1~18.04) ...
Selecting previously unselected package python3-virtualenv.
Preparing to unpack .../42-python3-virtualenv_15.1.0+ds-1.1_all.deb ...
Unpacking python3-virtualenv (15.1.0+ds-1.1) ...
Selecting previously unselected package virtualenv.
Preparing to unpack .../43-virtualenv_15.1.0+ds-1.1_all.deb ...
Unpacking virtualenv (15.1.0+ds-1.1) ...
Selecting previously unselected package libffi-dev:amd64.
Preparing to unpack .../44-libffi-dev_3.2.1-8_amd64.deb ...
Unpacking libffi-dev:amd64 (3.2.1-8) ...
Setting up libquadmath0:amd64 (8.4.0-1ubuntu1~18.04) ...
Setting up libgomp1:amd64 (8.4.0-1ubuntu1~18.04) ...
Setting up libatomic1:amd64 (8.4.0-1ubuntu1~18.04) ...
Setting up python-pip-whl (9.0.1-2.3~ubuntu1.18.04.1) ...
Setting up libcc1-0:amd64 (8.4.0-1ubuntu1~18.04) ...
Setting up libtsan0:amd64 (8.4.0-1ubuntu1~18.04) ...
Setting up linux-libc-dev:amd64 (4.15.0-101.102) ...
Setting up libffi-dev:amd64 (3.2.1-8) ...
Setting up liblsan0:amd64 (8.4.0-1ubuntu1~18.04) ...
Setting up gcc-7-base:amd64 (7.5.0-3ubuntu1~18.04) ...
Setting up binutils-common:amd64 (2.30-21ubuntu1~18.04.3) ...
Setting up libmpx2:amd64 (8.4.0-1ubuntu1~18.04) ...
Setting up libssl1.1:amd64 (1.1.1g-1+ubuntu18.04.1+deb.sury.org+1) ...
Setting up augeas-lenses (1.10.1-2) ...
Setting up openssl (1.1.1g-1+ubuntu18.04.1+deb.sury.org+1) ...
Installing new version of config file /etc/ssl/openssl.cnf ...
Setting up libmpc3:amd64 (1.1.0-1) ...
Setting up libc-dev-bin (2.27-3ubuntu1) ...
Setting up python3-lib2to3 (3.6.9-1~18.04) ...
Setting up libc6-dev:amd64 (2.27-3ubuntu1) ...
Setting up python3-distutils (3.6.9-1~18.04) ...
Setting up libitm1:amd64 (8.4.0-1ubuntu1~18.04) ...
Setting up libpython2.7-stdlib:amd64 (2.7.17-1~18.04ubuntu1) ...
Setting up libisl19:amd64 (0.19-1) ...
Setting up libasan4:amd64 (7.5.0-3ubuntu1~18.04) ...
Setting up libbinutils:amd64 (2.30-21ubuntu1~18.04.3) ...
Setting up libcilkrts5:amd64 (7.5.0-3ubuntu1~18.04) ...
Setting up libubsan0:amd64 (7.5.0-3ubuntu1~18.04) ...
Setting up libssl-dev:amd64 (1.1.1g-1+ubuntu18.04.1+deb.sury.org+1) ...
Setting up libaugeas0:amd64 (1.10.1-2) ...
Setting up python2.7 (2.7.17-1~18.04ubuntu1) ...
Setting up libgcc-7-dev:amd64 (7.5.0-3ubuntu1~18.04) ...
Setting up cpp-7 (7.5.0-3ubuntu1~18.04) ...
Setting up libpython-stdlib:amd64 (2.7.15~rc1-1) ...
Setting up python3-virtualenv (15.1.0+ds-1.1) ...
Setting up libpython2.7:amd64 (2.7.17-1~18.04ubuntu1) ...
Setting up libexpat1-dev:amd64 (2.2.5-3ubuntu0.2) ...
Setting up libpython2.7-dev:amd64 (2.7.17-1~18.04ubuntu1) ...
Setting up virtualenv (15.1.0+ds-1.1) ...
Setting up python2.7-dev (2.7.17-1~18.04ubuntu1) ...
Setting up python (2.7.15~rc1-1) ...
Setting up binutils-x86-64-linux-gnu (2.30-21ubuntu1~18.04.3) ...
Setting up cpp (4:7.4.0-1ubuntu2.3) ...
Setting up libpython-dev:amd64 (2.7.15~rc1-1) ...
Setting up python-dev (2.7.15~rc1-1) ...
Setting up python-pkg-resources (39.0.1-2) ...
Setting up python-virtualenv (15.1.0+ds-1.1) ...
Setting up binutils (2.30-21ubuntu1~18.04.3) ...
Setting up gcc-7 (7.5.0-3ubuntu1~18.04) ...
Setting up gcc (4:7.4.0-1ubuntu2.3) ...
Processing triggers for man-db (2.8.3-2ubuntu0.1) ...
Processing triggers for mime-support (3.60ubuntu1) ...
Processing triggers for install-info (6.5.0.dfsg.1-2) ...
Processing triggers for libc-bin (2.27-3ubuntu1) ...
/home/ubuntu/certbot-auto has insecure permissions!
To learn how to fix them, visit https://community.letsencrypt.org/t/certbot-auto-deployment-best-practices/91979/
Creating virtual environment...
Installing Python packages...
Installation succeeded.
Saving debug log to /var/log/letsencrypt/letsencrypt.log
Plugins selected: Authenticator webroot, Installer None
Obtaining a new certificate
Performing the following challenges:
http-01 challenge for itreport.tk
http-01 challenge for www.itreport.tk
Using the webroot path /var/www/letsencrypt for all unmatched domains.
Waiting for verification...
Cleaning up challenges

IMPORTANT NOTES:
 - Congratulations! Your certificate and chain have been saved at:
   /etc/letsencrypt/live/itreport.tk/fullchain.pem
   Your key file has been saved at:
   /etc/letsencrypt/live/itreport.tk/privkey.pem
   Your cert will expire on 2020-08-31. To obtain a new or tweaked
   version of this certificate in the future, simply run certbot-auto
   again. To non-interactively renew *all* of your certificates, run
   "certbot-auto renew"
 - Your account credentials have been saved in your Certbot
   configuration directory at /etc/letsencrypt. You should make a
   secure backup of this folder now. This configuration directory will
   also contain certificates and private keys obtained by Certbot so
   making regular backups of this folder is ideal.
 - If you like Certbot, please consider supporting our work by:

   Donating to ISRG / Let's Encrypt:   https://letsencrypt.org/donate
   Donating to EFF:                    https://eff.org/donate-le
마지막부분에 IMPORTANT NOTES: 에 Congratulations!이라고 시작하면서 HTTPS 인증서 파일 및 개인암호키가 저장되었다고 나옵니다. 또, expire on 2020-08-31 이라고 표시된 부분은 인증서 만료일도 나타납니다.
12-2-4. 이제 제대로 저장되었는지 확인해 보겠습니다.
명령창에 sudo ls -al /etc/letsencrypt/live/도메인명 을 입력합니다.
아래처럼 나오면 정상적으로 SSL키가 발급되어 저장된 것입니다.
ubuntu@wordpress:~$ sudo ls -al /etc/letsencrypt/live/itreport.tk
total 12
drwxr-xr-x 2 root root 4096 Jun  2 16:24 .
drwx------ 3 root root 4096 Jun  2 16:24 ..
-rw-r--r-- 1 root root  692 Jun  2 16:24 README
lrwxrwxrwx 1 root root   35 Jun  2 16:24 cert.pem -> ../../archive/itreport.tk/cert1.pem
lrwxrwxrwx 1 root root   36 Jun  2 16:24 chain.pem -> ../../archive/itreport.tk/chain1.pem
lrwxrwxrwx 1 root root   40 Jun  2 16:24 fullchain.pem -> ../../archive/itreport.tk/fullchain1.pem
lrwxrwxrwx 1 root root   38 Jun  2 16:24 privkey.pem -> ../../archive/itreport.tk/privkey1.pem
12-2-5. 그리고 인증서 만료시일 확인하는 방법을 알아보겠습니다.
명령창에 /home/ubuntu/certbot-auto certificates 를 입력합니다.
ubuntu@wordpress:~$ /home/ubuntu/certbot-auto certificates
Requesting to rerun /home/ubuntu/certbot-auto with root privileges...
/home/ubuntu/certbot-auto has insecure permissions!
To learn how to fix them, visit https://community.letsencrypt.org/t/certbot-auto-deployment-best-practices/91979/
Saving debug log to /var/log/letsencrypt/letsencrypt.log

- - - - - - - - - - - - - - - - - - - - - - - - - - - - - - - - - - - - - - - -
Found the following certs:
  Certificate Name: itreport.tk
    Serial Number:
    Domains: itreport.tk www.itreport.tk
    Expiry Date: 2020-08-31 06:24:04+00:00 (VALID: 89 days)
    Certificate Path: /etc/letsencrypt/live/itreport.tk/fullchain.pem
    Private Key Path: /etc/letsencrypt/live/itreport.tk/privkey.pem
- - - - - - - - - - - - - - - - - - - - - - - - - - - - - - - - - - - - - - - -
12-2-6. 이제 인증서를 자동 갱신하여 보겠습니다.
인증서 자동갱신은 일정시간마다 작업을 실행시켜주는 자동 스케줄러를 만들어 진행 할 예정입니다. crontab
우선 이건 root 권한에서 실행해야 합니다.
명령창에 sudo su 를 입력합니다. 그 후에 명령창에 crontab -e 를 입력합니다.
에디터 선택을 하라고 하면 편하신 것을 하시면 되는데 저는 nano 에디터를 선택하겠습니다. (다른 에디터를 사용할 줄 모릅니다.;;)
ubuntu@wordpress:~$ sudo su
root@wordpress:/home/ubuntu# crontab -e
no crontab for root - using an empty one

Select an editor.  To change later, run 'select-editor'.
  1. /bin/nano        <---- easiest
  2. /usr/bin/vim.basic
  3. /usr/bin/vim.tiny
  4. /bin/ed

Choose 1-4 [1]: 1
그럼 nano 에디터가 자동 스케줄러 파일을 보여줍니다. 모두 # 으로 주석처리가 되어 있을 겁니다.
스케줄 규칙은 아래와 같습니다.
┌─────────────── 분 (0 - 59)
│┌────────────── 시 (0 - 23)
││┌───────────── 일 (1 - 31)
│││┌──────────── 월 (1 - 12)
││││┌─────────── 요일 (0 - 6 : 0이 일요일이며 6은 토요일입니다.)
│││││ ┌───────── 실행 명령입니다.
***** Command to execute
그래서 저는 매일 새벽 3시에 certbot-auto를 새로 실행하도록 하며 갱신을 성공적으로 마치면 그 후에 nginx 서버를 재시동합니다. 그 다음 매주 월요일 새벽 4시에 서버를 리부팅 하려고 합니다. (-renew-hook 을 하면 갱신 후이며 갱신 전은 --pre-hook입니다.)
에디터 창에
0 3 * * * /home/ubuntu/certbot-auto renew --renew-hook "sudo service nginx restart"
0 4 * * 1 root shutdown now -r
을 입력합니다.
0 3 * * * /home/ubuntu/certbot-auto renew --renew-hook "sudo service nginx restart"
0 4 * * 1 root shutdown now -r
그럼 에디터 창 내용은 아래와 같습니다.
# Edit this file to introduce tasks to be run by cron.
#
# Each task to run has to be defined through a single line
# indicating with different fields when the task will be run
# and what command to run for the task
#
# To define the time you can provide concrete values for
# minute (m), hour (h), day of month (dom), month (mon),
# and day of week (dow) or use '*' in these fields (for 'any').#
# Notice that tasks will be started based on the cron's system
# daemon's notion of time and timezones.
#
# Output of the crontab jobs (including errors) is sent through
# email to the user the crontab file belongs to (unless redirected).
#
# For example, you can run a backup of all your user accounts
# at 5 a.m every week with:
# 0 5 * * 1 tar -zcf /var/backups/home.tgz /home/
#
# For more information see the manual pages of crontab(5) and cron(8)
#
# m h  dom mon dow   command

0 3 * * * /home/ubuntu/certbot-auto renew --renew-hook "sudo service nginx restart"
0 4 * * 1 root shutdown now -r
그 다음 CTRL + X를 하시고 Y를 누르신 후 파일명이 나오면 엔터를 누르고 나오시면 됩니다.
그럼 자동 스케줄링이 완성되었습니다.
이번에는 SSL 인증서를 웹서버인 Nginx에 적용해 보겠습니다.
12-3-1. 우선 인증서를 적용하기 openssl을 사용하여 dhparam을 암호화 하겠습니다.
명령창에서 sudo openssl dhparam -out /etc/nginx/dhparam.pem 4096 를 입력합니다.
* 참고로 10-20분 정도의 시간이 걸린 듯 합니다. 아래 저 점들은 많이 줄인 겁니다.;;;
ubuntu@wordpress:~$ sudo openssl dhparam -out /etc/nginx/dhparam.pem 4096
Generating DH parameters, 4096 bit long safe prime, generator 2
This is going to take a long time
..............................+...................................................
............................+.....................................................
..................................................................................
....+..+............................+.............................................
..................................................................................
..................................................................................
.........................+........................................................
...........................................................+......................
.............................................+....................................
..................................................................................
..................................................................+...............
..................................................................................
.........................................+......................................+.
..................................................................................
..................................................................................
..............................................................................+...
.....+............................................................................
..................................................................................
.............................+............................+.......................
..................................................................................
........+.........................................................................
..........................................................+.......................
................................................................+...+.............
................+.....................+...........................................
........................................................++*++*++*
12-3-2. dhparam.pem이 생성되었다면 이제 ssl.conf를 생성해 보겠습니다.
명령창에 sudo touch /etc/nginx/snippets/ssl.conf 와 sudo chmod 777 /etc/nginx/snippets/ssl.conf 를 입력합니다.
ubuntu@wordpress:~$ sudo touch /etc/nginx/snippets/ssl.conf
ubuntu@wordpress:~$ sudo chmod 777 /etc/nginx/snippets/ssl.conf
12-3-3. 생성된 ssl.conf에 보안설정문을 입력합니다.
ssl.conf 보안설정문 입력을 위하여 Editplus로 접속하여 /etc/nginx/snippets/에 접속 ssl.conf 파일을 열어 아래 내용을 입력합니다.
또는 명령창에 sudo nano /etc/nginx/snippets/ssl.conf 를 입력합니다. 아래 내용을 드래그 하신 후 CTRL + C 하시고 PuTTY화면에서 마우스 오른쪽을 눌러 붙이신 후 CTRL + X하시고 Yes을 누르신 다음 파일명이 나오면 Enter키를 누르시면 됩니다.
ssl_session_timeout 1d;
ssl_session_cache shared:SSL:50m;
ssl_session_tickets off;
ssl_protocols TLSv1 TLSv1.1 TLSv1.2;
ssl_dhparam /etc/nginx/dhparam.pem;
ssl_ciphers ECDHE-RSA-AES256-GCM-SHA512:DHE-RSA-AES256-GCM-SHA512:ECDHE-RSA-AES256-GCM-SHA384:DHE-RSA-AES256-GCM-SHA384:ECDHE-RSA-AES256-SHA384;
ssl_ecdh_curve secp384r1;
ssl_prefer_server_ciphers on;
ssl_stapling on;
ssl_stapling_verify on;

resolver 8.8.8.8 8.8.4.4;
add_header Strict-Transport-Security "max-age=15768000; includeSubdomains; preload";
add_header X-Content-Type-Options nosniff;
add_header X-Frame-Options "SAMEORIGIN";
ssl_session_timeout 1d;
ssl_session_cache shared:SSL:50m;
ssl_session_tickets off;
ssl_protocols TLSv1 TLSv1.1 TLSv1.2;
ssl_dhparam /etc/nginx/dhparam.pem;
ssl_ciphers ECDHE-RSA-AES256-GCM-SHA512:DHE-RSA-AES256-GCM-SHA512:ECDHE-RSA-AES256-GCM-SHA384:DHE-RSA-AES256-GCM-SHA384:ECDHE-RSA-AES256-SHA384;
ssl_ecdh_curve secp384r1;
ssl_prefer_server_ciphers on;
ssl_stapling on;
ssl_stapling_verify on;
resolver 8.8.8.8 8.8.4.4;
add_header Strict-Transport-Security "max-age=15768000; includeSubdomains; preload";
add_header X-Content-Type-Options nosniff;
add_header X-Frame-Options "SAMEORIGIN";12-3-4. 이제 ssl.conf가 작성이 완료되었으니 수정할 수 없도록 권한을 변경합니다.
명령창에서 sudo chmod 644 /etc/nginx/snippets/ssl.conf 를 입력합니다.
ubuntu@wordpress:~$ sudo chmod 644 /etc/nginx/snippets/ssl.conf12-3-5. nginx에 라우팅 적용하기
이제 전체적으로 HTTPS가 적용된 도메인으로 운영하기 위하여 /etc/nginx/sites-available/default 파일을 수정합니다.
내용이 복잡하기 에디터로 수정하시기는 것을 추천해 드립니다.
Editplus에서 /etc/nginx/sites-available/default 를 열어 아래 내용을 붙여 줍니다.
제가 샘플로 작성한 도메인은 itreport.tk 입니다. 해당 내용을 본인이 등록한 도메인 이름으로 변경해 주시면 될 것 같습니다.
보시면 변화가 많이 있습니다.;;; 해당 내용으로 덮어쓰기 한다고 생각하시는 것을 추천해 드립니다.
나중에 해당 내용을 분석하여 주석을 달아서 설명해 드리겠습니다.
# Default HTTPS server configuration
server {
    listen 443 ssl http2 default_server;
    listen [::]:443 ssl http2 default_server;
    server_name itreport.tk;

    ssl_certificate /etc/letsencrypt/live/itreport.tk/fullchain.pem;
    ssl_certificate_key /etc/letsencrypt/live/itreport.tk/privkey.pem;
    ssl_trusted_certificate /etc/letsencrypt/live/itreport.tk/fullchain.pem;
    include /etc/nginx/snippets/ssl.conf;

    root /var/www/html;
    index index.php index.html index.htm index.nginx-debian.html;

    location / {
        try_files $uri $uri/ =404;
        if (!-e $request_filename) {
         rewrite ^.*$ /index.php last;
       }
    }

    location ~ \.php$ {
        include snippets/fastcgi-php.conf;
        fastcgi_pass unix:/run/php/php7.4-fpm.sock;
        fastcgi_param SCRIPT_FILENAME $document_root$fastcgi_script_name;
        include fastcgi_params;
       fastcgi_read_timeout 300;
    }

    location ~ /\.ht {
        deny all;
   }
}

# HTTPS www. server configuration
server {
    listen 443 ssl http2;
    listen [::]:443 ssl http2;
    server_name www.itreport.tk;

    ssl_certificate /etc/letsencrypt/live/itreport.tk/fullchain.pem;
    ssl_certificate_key /etc/letsencrypt/live/itreport.tk/privkey.pem;
    ssl_trusted_certificate /etc/letsencrypt/live/itreport.tk/fullchain.pem;
    include /etc/nginx/snippets/ssl.conf;

    location / {
        return 301 https://itreport.tk$request_uri;
    }
}


# Default server configuration
server {
    listen 80;
    listen [::]:80 default_server;
    server_name itreport.tk;

    include /etc/nginx/snippets/letsencrypt.conf;

    location / {
        return 301 https://itreport.tk$request_uri;
    }
}

# HTTP - CNAME Connect www.itreport.tk to itreport.tk
server {
    listen 80;
    listen [::]:80;
    server_name www.itreport.tk;

    include /etc/nginx/snippets/letsencrypt.conf;

    location / {
        return 301 https://www.itreport.tk$request_uri;
    }
}
이제 대부분의 작업을 하였습니다.
12-3-6. 마지막으로 nginx를 다시 재가동하고 사이트에서 확인해 봅니다.
명령창에서 sudo nginx -t 를 입력합니다.
ubuntu@wordpress:~$ sudo nginx -t
nginx: the configuration file /etc/nginx/nginx.conf syntax is ok
nginx: configuration file /etc/nginx/nginx.conf test is successful
문법이 문제 없고 nginx구성파일에 테스트 접속이 가능하다면 nginx 서버를 재시작합니다.
명령창에 sudo service nginx restart 를 입력합니다.
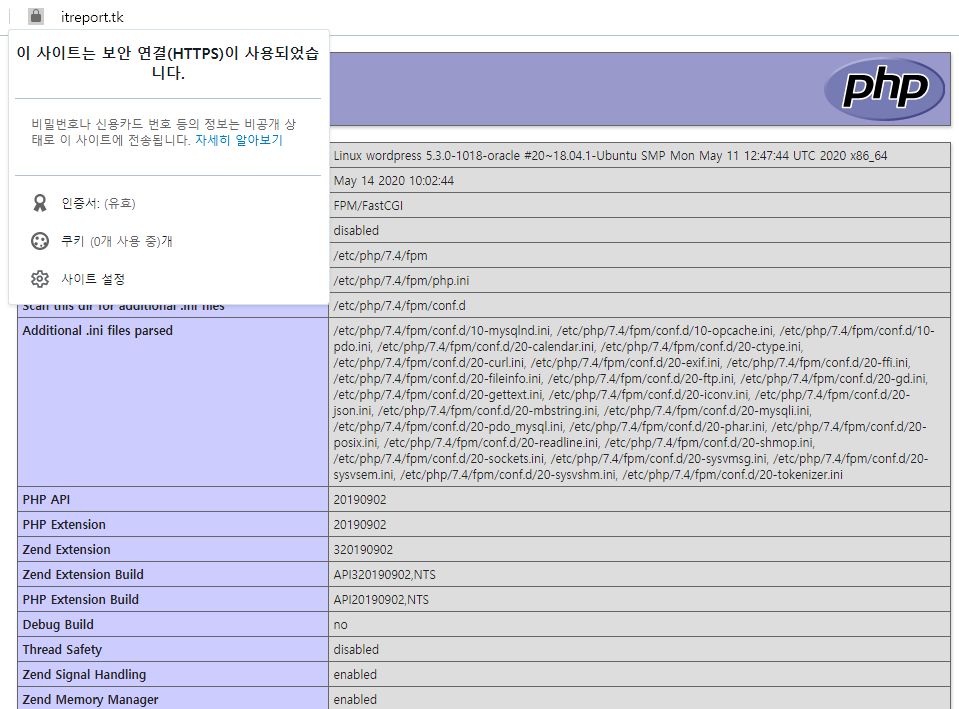
ubuntu@wordpress:~$ sudo service nginx restart그럼 웹브라우저에서 확인해보면 HTTPS가 적용된 것을 확인할 수 있습니다.
Contents
* 해당 내용은 오라클 제품을 다루고 있지만 이는 개인적인 테스트 결과이며, 오라클 공식 문서는 아님을 미리 밝힙니다.
'Oracle Cloud' 카테고리의 다른 글
| 13. 오라클 클라우드에서 우분투 LEMP - DB 생성하기 (3) | 2020.06.08 |
|---|---|
| 오라클 클라우드 - Cloud Shell을 이용하여 PuTTY 없이 접속하기 (4) | 2020.06.07 |
| 오라클 클라우드 - Ubuntu에서 root 계정으로 SSH 접속 방법 (11) | 2020.06.06 |
| 11. 오라클 클라우드에서 우분투 LEMP - sendmail 설치하기 (12) | 2020.06.06 |
| 10. 오라클 클라우드에서 우분투 LEMP - 도메인 연결하기 (5) | 2020.06.05 |